How To Vent A Bathroom Exhaust Fan Through a Soffit
Proper ventilation is crucial for bathroom hygiene and structural integrity. A well-vented bathroom exhaust fan removes excess moisture, preventing mold growth, mildew, and potential damage to walls, ceilings, and fixtures. Venting through a soffit offers a discreet and often efficient path for exhaust air removal, especially in single-story homes or upper-level bathrooms. However, proper installation is essential to ensure effectiveness and prevent issues such as moisture intrusion into the attic or soffit area.
Choosing the Right Vent and Materials
Selecting appropriate venting materials is critical for a successful soffit vent installation. Use a rigid metal or PVC duct, as flexible ducts can sag and trap moisture, reducing airflow efficiency. Smooth-walled ducts offer less resistance to airflow than corrugated ducts. Ensure the duct diameter matches the exhaust fan outlet size. It's also crucial to choose a soffit vent designed specifically for exhaust fan terminations. These vents typically feature backdraft dampers to prevent outside air from entering the ductwork. Opt for vents constructed from durable, weather-resistant materials like UV-stabilized plastic or aluminum.
Planning the Vent Path
Before beginning the installation, carefully plan the vent path. The shortest, straightest route to the soffit is usually the most efficient for airflow. Avoid sharp bends or kinks in the ductwork, as these will restrict airflow and increase noise. Inspect the soffit area for obstructions such as wiring, plumbing, or structural elements. In some cases, minor adjustments to the soffit construction may be necessary to accommodate the vent. Ensure the chosen vent location provides adequate clearance from soffit vents designed for attic ventilation to prevent recirculation of exhaust air back into the attic.
Installing the Ductwork
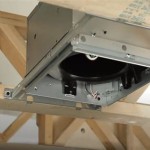
Begin by attaching the duct to the exhaust fan housing using metal foil tape. Secure the duct along its path with duct straps or hangers, ensuring it's adequately supported and doesn't sag. When running ductwork through insulation, maintain a gap between the duct and the insulation to prevent condensation. If the duct must pass through a fire-rated wall or ceiling, use a fire-rated damper and sealant to maintain the fire barrier's integrity. Insulated ducting can help minimize condensation and improve energy efficiency, especially in colder climates.
Cutting the Soffit Opening and Installing the Vent
Once the ductwork is in place, carefully measure and mark the location for the soffit vent. Use a jigsaw or reciprocating saw to create the opening, ensuring it's slightly smaller than the vent's outer dimensions. Apply a bead of sealant around the opening to prevent moisture intrusion. Insert the soffit vent into the opening and secure it with screws, ensuring a tight seal. Connect the duct to the vent using foil tape, ensuring a secure and airtight connection. Finally, apply caulk around the perimeter of the vent to further seal against weather elements.
Testing the Installation
After completing the installation, thoroughly test the system. Turn on the exhaust fan and observe the airflow at the soffit vent. Check for any leaks or backdrafts. Hold a tissue near the vent opening; it should be drawn towards the vent, indicating proper suction. If there's inadequate airflow, check for obstructions in the ductwork, ensure proper connections, and verify the exhaust fan is functioning correctly. Additionally, listen for excessive noise; unusual sounds may indicate improper duct installation or fan issues.
Maintaining the Soffit Vent
Regular maintenance is important for optimal performance. Periodically inspect the soffit vent for signs of damage, debris buildup, or insect nests. Clean the vent cover and remove any obstructions to ensure free airflow. Inspect the ductwork for signs of leaks or disconnections and repair them promptly. If insulated ducting is used, check the insulation for signs of moisture damage and replace if necessary. Proper maintenance will prolong the life of the vent and ensure the exhaust fan continues to effectively remove moisture from the bathroom.
Addressing Potential Challenges
Certain challenges might arise during soffit vent installation. Limited access to the soffit area can make installation difficult. In such cases, specialized tools or professional assistance may be necessary. Dealing with existing soffit construction, such as intricate designs or unique materials, might require modifications to accommodate the vent. Understanding local building codes and regulations pertaining to venting is essential before commencing any work. Non-compliance can lead to fines or necessitate costly rework.

Blog

Venting A Bath Fan In Cold Climate Fine Homebuilding

Adding A Bathroom Fan Fine Homebuilding

Bathroom Exhaust Fans Building America Solution Center

Bathroom Exhaust Fans The Complete Guide By Fanco

Bathroom Exhaust Vents In Your San Antonio Area Home Jwk Inspections

Best Practices Bathroom Venting Greenbuildingadvisor

Bathroom Exhaust Vents In Your San Antonio Area Home Jwk Inspections

Venting A Bathroom Through Sips Fine Homebuilding

Bathroom Fan Venting Tips Gui
Related Posts
