Essential Aspects of Installing a New Moen Bathroom Faucet
Upgrading your bathroom with a new Moen faucet is an excellent way to enhance both its functionality and aesthetics. To ensure a seamless installation process and long-lasting performance, it's crucial to consider several essential aspects, including preparation, tool selection, and proper technique.
This article will guide you through the key elements of installing a new Moen bathroom faucet, providing valuable tips and insights to help you achieve a successful outcome. Whether you're a seasoned DIY enthusiast or tackling this project for the first time, this comprehensive guide will empower you with the knowledge and confidence to complete the installation with precision and ease.
Preparation: Laying the Groundwork
Before embarking on the installation process, it's essential to prepare your bathroom appropriately. This includes gathering the necessary tools, such as an adjustable wrench, basin wrench, and plumber's putty. Additionally, ensure that your water supply is turned off at the main valve to prevent any leaks or accidents during the installation.
Tool Selection: Choosing the Right Equipment
The right tools can significantly enhance the installation process and ensure a secure and leak-free connection. A basin wrench is specifically designed for working in tight spaces around sinks and faucets, making it invaluable for removing and tightening nuts. Additionally, an adjustable wrench provides versatility for various tasks, such as holding supply lines in place. Plumber's putty is a pliable sealant that helps create a watertight seal around the base of the faucet, preventing leaks. By selecting the appropriate tools, you can ensure a professional-grade installation.
Proper Technique: Achieving a Secure and Leak-Free Installation
Once you have gathered the necessary tools and prepared your bathroom, follow these steps for a successful installation:
- Remove the old faucet by unscrewing the nuts securing it to the sink.
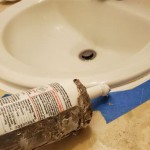
- Clean the sink surface and apply plumber's putty around the base of the new faucet.
- Place the new faucet into the mounting holes and tighten the nuts securely.
- Attach the supply lines to the corresponding hot and cold water valves.
- Turn on the water supply and check for any leaks. If leaks occur, tighten the connections as needed.
Conclusion: Embracing a Functional and Aesthetic Upgrade
Installing a new Moen bathroom faucet empowers you to enhance both the functionality and aesthetics of your bathroom. By carefully considering the essential aspects outlined in this article, you can achieve a secure and leak-free installation that will provide years of reliable performance. Whether you're looking to upgrade your current faucet or embarking on a complete bathroom renovation, this guide has equipped you with the knowledge and confidence to tackle the project with precision and success.

How To Install A Moen Centerset Faucet

How To Install Bathroom Faucet And Drain Moen Adler Collection

How To Install A New Bathroom Faucet In Pedestal Sink Moendiyer Simply Designing With Ashley

Install Moen Bathroom Sink Faucet And Drain

Diy How To Install The Moen Boardwalk Faucet Redhead Mom

How To Install A Bathroom Faucet Artsy Fartsy Mama

How To Install A New Bathroom Faucet Make Life Lovely

How To Install Moen Bathroom Faucet

How To Install Bathroom Faucet And Drain Moen Adler Collection

Update Your Bathroom With A New Moen Boardwalk Faucet Share Remember Celebrating Child Home
Related Posts