Install Plumbing Under Bathroom Sink
Installing plumbing under a bathroom sink is a project that can be completed by most DIYers. By following these steps, you can ensure that your sink is properly installed and functioning correctly.
Step 1: Gather your materials
Before you begin, you'll need to gather the following materials:
- New sink and faucet
- Sink drain
- Two 1/2-inch supply lines (one for hot water and one for cold water)
- Two 3/8-inch compression nuts
- Two 3/8-inch rubber washers
- Plumber's putty
- Teflon tape
- Adjustable wrench
- Phillips screwdriver
Step 2: Turn off the water supply
Before you begin working, you'll need to turn off the water supply to your sink. To do this, locate the shut-off valves under your sink and turn them clockwise until they are closed.
Step 3: Remove the old sink
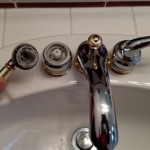
Once the water supply is turned off, you can begin removing the old sink. First, disconnect the supply lines from the faucet. Then, unscrew the nuts that hold the sink in place and lift the sink off of the vanity.
Step 4: Clean the vanity top
Once the old sink is removed, take the opportunity to clean the vanity top. Remove any old caulk or sealant around the edges of the sink hole. Then, wipe down the vanity top with a clean cloth.
Step 5: Apply plumber's putty
Plumber's putty is a sealant that helps to keep water from leaking around the drain hole. To apply plumber's putty, roll it into a rope and then place it around the edge of the sink drain hole. Press the putty into place so that it forms a seal.
Step 6: Install the sink
Now it's time to install the new sink. First, place the sink over the drain hole and align it with the vanity top. Then, secure the sink in place with the nuts that you removed earlier.
Step 7: Connect the supply lines
Next, connect the supply lines to the faucet. To do this, insert a rubber washer into each compression nut and then screw the nuts onto the faucet. Tighten the nuts until they are snug.
Step 8: Turn on the water supply
Once the supply lines are connected, you can turn on the water supply. To do this, turn the shut-off valves counterclockwise until they are open.
Step 9: Check for leaks
After you've turned on the water supply, check for leaks. Inspect the joints around the drain, the faucet, and the supply lines. If you see any leaks, tighten the nuts or apply more plumber's putty until the leaks stop.
Step 10: Finish the installation
Once you're satisfied that there are no leaks, you can finish the installation. caulk around the edges of the sink to seal it and to prevent water from leaking onto the vanity top.
Tips
- If you're not comfortable working with plumbing, it's best to hire a qualified plumber to install your bathroom sink.
- Be sure to turn off the water supply before you begin working.
- Don't overtighten the nuts when you're connecting the supply lines.
- If you have any questions, consult the instructions that came with your new sink.
By following these steps, you can install plumbing under a bathroom sink yourself. With a little planning and effort, you can save money and complete the project in a day.
How To Install Bathroom Sink Drain Queen Bee Of Honey Dos

How To Install The P Trap Under A Sink Dummies

Bathroom Sink Plumbing Installation Diy Montreal

How To Install P Trap And Bathroom Sink Drain Piping Easy Installation For Beginners

How To Install A Pipe From Sink Drain Wall Ehow

Replace A Trap And Add Cleanout Fine Homebuilding

Bathroom Sink Plumbing Installation Diy Montreal

How To Fit A Bathroom Sink Diy Guides Victorian Plumbing

How To Connect A Bathroom Sink Drain
How To Install Bathroom Sink Drain Queen Bee Of Honey Dos
Related Posts


