Installing a Bathroom Sink Waste Pipe: A Step-by-Step Guide
Installing a bathroom sink waste pipe is a relatively simple task that can be completed in a few hours with the right tools and materials. This guide explains the essential steps involved in installing a waste pipe, including preparing the sink, connecting the drain, and securing the pipe.
Materials and Tools Required:
- Sink waste pipe
- Slip joint nuts
- P-trap
- Drain flange
- Putty knife
- Wrenches
- Plumber's putty
- Tape measure
Step 1: Prepare the Sink
Begin by measuring the distance from the drain hole to the wall behind the sink. This will determine the length of the waste pipe required. Remove the old waste pipe and drain assembly, if necessary. Clean the drain hole and surrounding area to remove any debris.
Step 2: Assemble the Drain
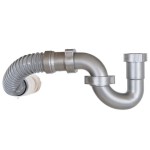
Place the rubber washer on the drain flange and insert it into the drain hole. Secure the flange with the slip joint nut and tighten using a wrench. Next, attach the P-trap to the drain flange with another slip joint nut. Ensure the trap is oriented correctly, with the curved portion pointing downward.
Step 3: Install the Waste Pipe
Cut the waste pipe to the appropriate length and insert the end into the P-trap. Tighten the slip joint nut to secure the connection. Measure and cut the other end of the waste pipe to fit between the P-trap and the wall. Slide the waste pipe over the slip joint nut on the P-trap and tighten.
Step 4: Secure the Waste Pipe
Apply a generous bead of plumber's putty around the base of the drain flange. Press the flange firmly into place to seal the connection. Use a putty knife to smooth the excess putty. Clamp the waste pipe to the wall using pipe clamps or zip ties. This prevents the pipe from sagging or shifting.
Step 5: Connect to the Drain Line
Cut a section of pipe from the drain line to make room for the waste pipe. Insert the waste pipe into the drain line and tighten the slip joint nut. If necessary, use a wrench to hold the drain line in place while tightening the nut.
Step 6: Test and Finish
Turn on the water and allow it to run into the sink. Check for any leaks at the connections. If necessary, tighten the nuts or apply additional plumber's putty. Wipe up any excess water or putty from the area.
Conclusion
By following these steps, you can successfully install a bathroom sink waste pipe. Remember to use caution when working with plumbing connections and take the necessary steps to prevent leaks. With a bit of care and attention, you can complete this task safely and efficiently.
How To Install Bathroom Sink Drain Queen Bee Of Honey Dos

How To Install A Pipe From Sink Drain Wall Ehow

Simple Ways To Fit A Sink Waste Pipe With Pictures Wikihow
How To Install Bathroom Sink Drain Queen Bee Of Honey Dos

Simple Ways To Fit A Sink Waste Pipe With Pictures Wikihow

Bathroom Sink Plumbing Installation Diy Montreal

How To Install A Flexible Waste Pipe When The Drain Doesn T Line Up Handyman S Daughter

How To Install A Flexible Waste Pipe When The Drain Doesn T Line Up Handyman S Daughter

Simple Ways To Fit A Sink Waste Pipe With Pictures Wikihow

Bathroom Sink Plumbing Installation Diy Montreal
Related Posts
