Installing a New Bathroom Vanity Top: A Step-by-Step Guide
A new bathroom vanity top can instantly transform the look and feel of your bathroom, adding both style and functionality. Whether you're replacing an outdated counter or installing one for the first time, the process can seem daunting. However, with careful planning and the right tools, you can tackle this project with confidence. Here's a step-by-step guide to help you install your new bathroom vanity top flawlessly.
Materials and Tools You'll Need:
Before you begin, gather all the necessary materials and tools to avoid any delays during the installation process. Here's a checklist of what you'll need:
- New bathroom vanity top
- Vanity cabinet
- Level
- Tape measure
- Caulk gun and caulk
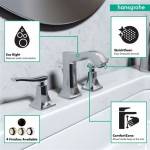
- Screws or bolts (may come with the vanity top)
- Drill or screwdriver
- Safety glasses
Step 1: Prepare the Vanity Cabinet
First, remove the old vanity top if one is present. Clean the surface of the vanity cabinet to remove any dirt or debris. Make sure the cabinet is level by placing a level on the top and adjusting the legs if necessary.
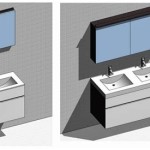
Step 2: Position and Align the Vanity Top
Carefully lay the vanity top over the cabinet and align it evenly. Use a level to ensure that the top is level in both directions. Make any necessary adjustments until the top is correctly positioned.
Step 3: Secure the Vanity Top
Depending on the type of vanity top and cabinet, you may need to use screws or bolts to secure it. If screws are provided, use a drill or screwdriver to insert them into the pre-drilled holes. For bolts, insert them through the holes and tighten them with a wrench or socket wrench.
Step 4: Caulk the Seams
To prevent water from seeping between the vanity top and cabinet, apply a bead of caulk around the edges where they meet. Use a caulk gun to evenly distribute the caulk and smooth it out with your finger or a caulk tool. Allow the caulk to dry and cure before using the vanity.
Step 5: Install the Sink
If your vanity top does not come with a pre-installed sink, you'll need to cut an opening and install it. Refer to the instructions provided with your sink for specific guidelines on how to do this.
Step 6: Connect the Plumbing
Once the sink is installed, connect the plumbing by attaching the water supply lines and drain assembly. Make sure all connections are secure and there are no leaks.
Step 7: Finishing Touches
Once everything is connected and secure, give your new bathroom vanity top a final inspection. Check for any loose screws or bolts and tighten them if necessary. Clean the surface with a mild cleaner to remove any debris or fingerprints.
Tips for a Successful Installation:
- Before purchasing a new vanity top, measure your existing cabinet carefully to ensure a perfect fit. - If you're not confident in your DIY skills, consider hiring a professional plumber or contractor for the installation. - Wear safety glasses throughout the installation process to protect your eyes from any flying debris or caulk. - Allow ample time for the caulk to dry completely before using the vanity. - Regularly clean and maintain your vanity top to keep it looking its best and prevent damage.

Replace Vanity Top And Faucet Diy Network

How To Replace A Bathroom Countertop Homeadvisor

How To Install A Pre Made Vanity Top Stagg Design

Replace Vanity Top And Faucet Diy Network

How To Remove A Countertop From Vanity Decor Adventures

How To Install Or Remove A Bathroom Vanity Homeserve Usa

Diy Replace Vanity Top

How To Install A Bathroom Vanity And Sink

Master Bathroom Remodel Part 8 How To Install New Tile Counter Tops Simply Designing With Ashley

Replace Granite Countertops Transform Your Bathroom S Look
Related Posts