Installing a New Delta Bathroom Faucet: A Comprehensive Guide
Upgrading your bathroom faucet is a relatively simple task that can enhance the look and functionality of your space. Delta faucets are renowned for their durability and stylish designs, making them a popular choice for homeowners. Whether you're installing a new faucet for the first time or replacing an old one, here's a comprehensive guide to help you through the process.
Tools and Materials You'll Need:
- Adjustable wrench
- Basin wrench
- Plumber's putty
- Teflon tape
- New Delta faucet
- Screwdriver (optional)
Step 1: Gather Your Tools and Materials
Before you start, gather all the necessary tools and materials to ensure a smooth installation process.
Step 2: Turn Off the Water Supply
Locate the shut-off valves under the sink and turn them clockwise to shut off the water supply to the faucet.
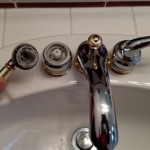
Step 3: Remove the Old Faucet
Use the basin wrench to loosen the nuts securing the old faucet to the sink. Carefully lift the old faucet out of the sink.
Step 4: Clean the Sink Surface
Wipe down the sink surface where the new faucet will be installed to remove any dirt or debris.
Step 5: Apply Plumber's Putty
Roll out a small piece of plumber's putty into a snake-like shape. Place the putty around the base of the new faucet, where it will meet the sink.
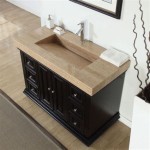
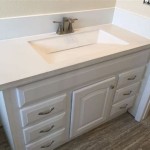
Step 6: Install the New Faucet
Insert the new faucet into the sink hole and tighten the nuts underneath the sink using the basin wrench.
Step 7: Apply Teflon Tape to the Supply Lines
Wrap Teflon tape clockwise around the threads of the supply lines attached to the new faucet.
Step 8: Connect the Supply Lines
Connect the supply lines to the corresponding water supply valves under the sink. Hand-tighten the connections and use the adjustable wrench to further tighten them, but avoid overtightening.
Step 9: Turn On the Water Supply
Slowly turn on the shut-off valves under the sink to allow water to flow through the new faucet.
Step 10: Check for Leaks
Inspect all the connections for leaks. Tighten any loose connections if necessary.
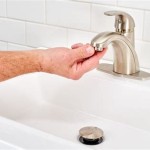
Step 11: Test the Faucet
Turn on the new faucet and check for proper water flow and temperature. Adjust the handles as needed to ensure smooth operation.
Tips:
- If you're replacing an existing faucet, ensure the new one has the same number of handles and holes required for installation.
- Apply Teflon tape to all threaded connections to prevent leaks.
- Handle the faucet with care to avoid scratching or damage.
- If you encounter any difficulties, refer to the manufacturer's instructions or seek professional assistance.

Where Can I Find Installation Instructions For My

How To Install A Bathroom Faucet By Delta

How To Replace A Two Handle Faucet Delta Blog

How To Install A Widespread Faucet The Home Depot

How To Install A New Delta Single Handle Bathroom Faucet And Pop Up Plumbing Electric Wonderhowto

How To Install A Bathroom Faucet By Delta

Plumbing 101 Installing A Delta Touch20 Faucet Kick Ass Or Die

Delta Foundations 4 In Centerset Single Handle Bathroom Faucet Chrome B510lf Ppu Eco The Home Depot

3538ssmpudst By Delta Faucet Company Stainless Two Handle Widespread Bathroom Studio41

Delta Compel Single Handle Bathroom Faucet Stainless Com
Related Posts