Installing A Wall Mounted Bathroom Sink: A Comprehensive Guide
Wall-mounted bathroom sinks are becoming increasingly popular due to their sleek design and space-saving features. Installing one can be a satisfying project for DIY enthusiasts. Here's a comprehensive guide to walk you through the essential aspects of installing a wall-mounted bathroom sink:
Planning and Preparation
Choose the Right Sink: Select a sink that complements the bathroom's style and meets your functional needs. Consider the basin size, shape, and material options (e.g., porcelain, glass, or stone).
Gather Tools and Materials: Collect all necessary tools, including a level, drill, screwdriver, wrench, tape measure, and safety goggles. You'll also need materials such as wall anchors, plumbing fixtures, and a faucet.
Installing the Wall Bracket
Mark the Wall: Use a level to determine the correct height and location of the sink. Mark the center point and drill pilot holes for the wall anchors.
Install the Anchors: Insert the wall anchors into the pilot holes and tighten them securely. These anchors will provide support for the sink bracket.
Mount the Bracket: Align the sink bracket with the anchors and secure it using the provided screws. Ensure the bracket is level and stable.
Connecting the Plumbing
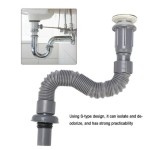
Install the Drain Assembly: Assemble the drain assembly and connect it to the sink's drain hole. Tighten the nuts underneath to prevent leaks.
Connect the Water Supply: Attach the water supply lines to the faucet and connect them to the hot and cold water shutoffs. Use wrench-tightened fittings for secure connections.
Test the Plumbing: Open the water shutoffs and check for any leaks. Adjust the water supply connections if necessary.
Mounting the Sink
Align the Sink: Position the sink on the wall bracket and align it with the plumbing connections. Adjust the bracket if needed to ensure a snug fit.
Secure the Sink: Slide the sink onto the bracket and tighten the mounting screws. Ensure the sink is stable and level.
Finishing Touches
Install the Faucet: Insert the faucet into the designated hole in the sink and secure it with a locking nut from underneath.
Caulk the Edges: Apply a bead of silicone caulk around the edges where the sink meets the wall. This will prevent water from seeping behind the sink.
Install the Pop-Up Drain Stopper: Insert the pop-up drain stopper into the assembly and secure it according to the manufacturer's instructions.
Conclusion
Installing a wall-mounted bathroom sink can upgrade the aesthetics and functionality of your bathroom. By following the steps outlined in this guide, you can confidently tackle this DIY project and achieve a professional-looking result. Remember to prioritize safety by wearing protective gear and carefully following all instructions.

Installing A Bathroom Sink Wall Hung Diy Family Handyman

How To Install A Sink Wall Mount 3 Minute Guide

How To Hang A Wall Mount Sink And Plumb It Too The Unprofessional

Fitting A Wall Hung Basin In Bathroom Guru

Wall Mount Sink Installation All Step By Instructions
How To Install A Wall Mount Sink In 6 Steps Signature Hardware

Wall Mounted Bathroom Sinks Pros Cons Diy Install Guide
How To Install A Wall Mount Sink In 6 Steps Signature Hardware

Wall Hung Washbasin Installation Cono Centro And Silenio Kaldewei

Fitting A Wall Hung Basin On Stud Bathroom Guru
Related Posts


