Installing Bathroom Sink Water Supply Lines: A Guide to Essential Aspects
Replacing or installing bathroom sink water supply lines is a relatively straightforward task that can be completed by most DIYers with basic plumbing skills. Here's a comprehensive guide to ensure a successful installation.
Gathering Necessary Materials and Tools
Before starting, gather the following materials and tools:
- New water supply lines (flexible or rigid)
- Compression nuts or compression sleeves (if using flexible lines)
- Teflon tape
- Adjustable wrench
- Pipe cutter or hacksaw
- Basin wrench
- Plumber's putty or silicone sealant
Choosing and Measuring Water Supply Lines
Flexible supply lines, made of stainless steel or PEX, are easier to install in tight spaces. Rigid copper lines are more durable but require soldering and bending. Measure the distance from the sink's water supply valves to the faucet connections and add an extra 6 inches for flexibility.
Shutting Off Water and Disconnecting Old Lines
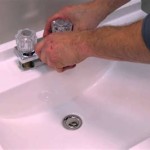
Turn off the water supply to the sink. Open the faucet to release any residual water. Use a basin wrench to loosen and remove the old water supply lines from the sink and water supply valves.
Installing the New Water Supply Lines
For flexible lines:
- Wrap Teflon tape clockwise around the threads of the compression nuts.
- Hand-tighten the compression nuts onto the water supply valves.
- Tighten the nuts further using an adjustable wrench.
- Insert the other end of the lines into the faucet connections and tighten them by hand.
For rigid copper lines:
- Cut the copper tubing to the desired length using a pipe cutter or hacksaw.
- Apply flux to the ends of the tubing and solder the compression sleeves onto the tubing.
- Tighten the compression nuts onto the water supply valves and faucet connections.
Applying Plumber's Putty or Silicone Sealant
Apply a bead of plumber's putty or silicone sealant around the base of the faucet where it meets the sink. This helps prevent water leaks from the faucet and sink joint.
Inspecting and Turning On Water
Once the water supply lines are installed and sealed, turn the water supply back on and check for leaks at all connections. If any leaks are detected, tighten the nuts or reapply sealant as necessary.
By following these steps, you can successfully install bathroom sink water supply lines and enjoy a leak-free and functional sink.

Fitting A Bathroom Sink Or Bidet Step By Guide And

Replace Old Bathroom Water Supply Lines Without Leaks By Home Repair Tutor

How To Replace A Water Supply Line Replacing Faucet Toilet Lines

How To Tighten Water Supply Line Connectors Diy Family Handyman

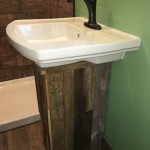
Here S How Install A Bathroom Pedestal Sink

How To Install A Vessel Sink Faucet

How To Install A Vessel Sink Faucet

Replace Bathroom Sink Water Supply Lines

How To Install A Vessel Sink Faucet

How To Replace Bathroom Water Supply Lines Home Repair Tutor
Related Posts