Kohler Bathroom Faucet Assembly Instructions
Installing a new bathroom faucet can be a rewarding DIY project, enhancing the aesthetic appeal and functionality of your bathroom. Kohler, a renowned brand known for its quality and style, offers a diverse range of bathroom faucets. While the specific steps may vary depending on the faucet model, this guide provides a general overview of the assembly process for common Kohler bathroom faucets.
1. Gather the Necessary Tools and Materials
Before embarking on the installation, ensure you have all the necessary tools and materials. This will streamline the process and prevent any delays. Here's a list of common essentials:
- Adjustable wrench
- Channel-lock pliers
- Phillips and flathead screwdrivers
- Plumber's tape (Teflon tape)
- Level
- Caulk gun
- Safety glasses
- Work gloves
- Kohler bathroom faucet kit (including faucet, mounting hardware, and instructions)
If your Kohler faucet includes a deck plate, you will also need a drill and drill bits suitable for the material of your countertop or sink.
2. Prepare the Existing Plumbing
Before installing the new faucet, you need to shut off the water supply to the sink. Locate the shut-off valves, typically found under the sink or in the basement. Turn the valves clockwise to stop the water flow. Once the valves are closed, you can drain the existing pipes by opening the faucet handles. This will release any remaining water pressure.
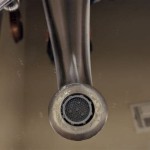
Next, remove the old faucet. Unscrew the mounting nuts beneath the sink using the adjustable wrench or channel-lock pliers. Once loosened, carefully detach the faucet from the sink. Disconnect the water supply lines, noting their positions for reinstallation. Finally, remove the old faucet's escutcheon plate, if applicable.
3. Installing the New Kohler Bathroom Faucet
With the old faucet removed, you can begin installing the new Kohler faucet. Follow these steps:
- Install the Mounting Plate: Depending on your faucet model, you might have a deck plate. Center the deck plate on the sink's countertop, ensuring it's level. If necessary, use a pencil to mark the drill points for the mounting screws. Use a drill to create the holes for the screws, and then secure the deck plate tightly using the provided screws.
- Connect the Water Supply Lines: Attach the water supply lines to the faucet's inlets. Apply plumber's tape to the threads of the supply lines to prevent leaks. Ensure the hot and cold lines are correctly connected to their respective inlets. Tighten the connections securely with a wrench.
- Mount the Faucet: Place the faucet body on the sink or countertop, ensuring it's level. If a separate mounting plate is used, it should be installed first. Position the faucet over the mounting holes, ensuring the spout is facing the desired direction. Attach the mounting nuts to the faucet's base, tighten them with a wrench, but avoid overtightening to prevent damage.
- Connect the Drain: Some Kohler faucets come with a pop-up drain assembly. Attach the pop-up drain to the sink's drain hole. Ensure the drain is secured properly. Connect the drain's tailpiece to the waste pipe, and tighten the connection with a wrench.
- Caulk the Faucet Base: Apply a bead of silicone caulk around the base of the faucet where it meets the countertop or sink. This will prevent water from seeping behind the faucet and creating mold or mildew.
- Reinstall the Handles: Install the faucet handles, ensuring they align correctly with the faucet body. Tighten the handle sets using a wrench or screwdriver as needed.
- Test for Leaks: Turn the water supply back on, slowly at first, and check for any leaks. If you find any leaks, tighten the connections further. Ensure the faucet operates smoothly both for hot and cold water.
Kohler often provides detailed installation instructions specific to each model. Refer to the instruction manual included with your faucet for precise steps and any model-specific details.
4. Care and Maintenance
To maintain the longevity and functionality of your Kohler bathroom faucet, follow these care tips:
- Clean your faucet regularly using a soft cloth and mild soap. Avoid using abrasive cleaners or chemicals, which can damage the finish.
- Ensure that the faucet is properly lubricated with a silicone-based lubricant, especially the handle stems and the pop-up drain assembly. This will help prevent sticking or squeaking.
- Over time, mineral deposits from hard water may accumulate on the faucet. Clean these deposits with a vinegar solution or a commercial limescale remover. Follow the manufacturer's instructions carefully.
- If you notice any leaks, tighten the connections or replace any worn-out parts. Address any problems promptly to prevent further damage.
By following these instructions, you can successfully install and maintain your Kohler bathroom faucet, ensuring a smooth and enjoyable experience for years to come.

Installation Instructions Kohler

Dimensions And Measurements Kohler

Installation Instructions Kohler

Installation Instructions Service Parts Rain Kohler

Installation Instructions Kohler

Installation Instructions Stillness Basin Set Wall Mount Kohler

Dimensions And Measurements Kohler

Installation Instructions Nateo Kitchen Mixer Kohler New Zealand

Diy Kohler Bathroom Sink Widespread Faucet Installation Diyprojectsbydave

Overriding The Sensor On Touchless Faucets