Moen Bathroom Faucet Fix Leak: A Guide to Troubleshooting and Repair
A dripping bathroom faucet is an annoying and potentially costly problem. Not only does it waste water and money, but it can also damage your bathroom fixtures over time. Moen faucets are known for their quality and durability, but even the best faucets can develop leaks. Thankfully, many common Moen faucet leaks can be addressed with basic plumbing skills and a few readily available tools. This guide will walk you through the most common causes of Moen bathroom faucet leaks and provide step-by-step instructions on how to fix them.
Identifying the Leak Source
Before attempting any repairs, it's crucial to identify the precise source of the leak. This will help you narrow down the potential causes and determine the appropriate repair strategy. Look for signs like: * **Drip from the spout:** This usually indicates a worn-out or damaged cartridge. * **Leak from the base of the faucet:** This could be due to a loose or cracked O-ring, worn packing nuts, or a loose mounting nut. * **Leak from the handle:** This could signify a loose or worn internal part, such as a stem or O-ring. Carefully observe where the water is coming from to pinpoint the source of the leak.
Common Moen Faucet Leak Causes and Troubleshooting
Moen faucets, while built with longevity in mind, can experience leaks due to a variety of common issues. Understanding these issues can help you pinpoint the problem and resolve it effectively.
1. Worn or Damaged Cartridge
The cartridge is the heart of your Moen faucet, controlling water flow and temperature. Over time, the ceramic discs within the cartridge can wear down, causing leaks. This is particularly common in faucets that have been exposed to hard water. If you notice a constant drip from the spout, this is a strong indicator of a worn cartridge.
2. Loose or Damaged O-rings
O-rings are small, rubber rings that create seals within the faucet. They prevent water from escaping around the handle, spout, or base. If an O-ring is loose, cracked, or worn out, it can cause leaks. They can be replaced with new, compatible rings.
3. Worn Packing Nuts
Packing nuts create a tight seal around the stem of the faucet, preventing water from leaking. They can become worn and lose their effectiveness over time. If your faucet is leaking from the base, this could be a sign of worn packing nuts that need replacement.
4. Loose Mounting Nut
The mounting nut secures the faucet to the sink. A loose mounting nut can allow water to leak from the base of the faucet. Tightening the mounting nut with a wrench should resolve the issue.
Repairing Moen Bathroom Faucet Leaks
Once you've identified the source of the leak, you can proceed with the appropriate repair.
Cartridge Replacement
Replacing a worn cartridge is a relatively simple process. Follow these steps:
- Turn off the water supply to the faucet.
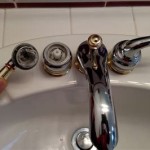
- Remove the handle by unscrewing it or releasing a clip, depending on your faucet model.
- Locate the cartridge (usually beneath the handle). To remove it, use a cartridge removal tool or a flathead screwdriver.
- Place the new cartridge in the faucet, ensuring the alignment pins match.
- Reassemble the faucet, attaching the handle and tightening the mounting nut.
- Turn on the water supply and test for leaks.
O-ring Replacement
Replacing O-rings requires careful removal and replacement. Follow these steps:
- Turn off the water supply to the faucet.
- Disassemble the faucet, removing the handle, spout, or base, depending on the location of the leaky O-ring.
- Carefully remove the old O-ring using a small screwdriver or pliers. Be careful not to damage the surrounding parts.
- Place the new O-ring in the appropriate groove, ensuring it is properly seated.
- Reassemble the faucet, tightening all parts securely.
- Turn on the water supply and test for leaks.
Packing Nut Replacement
Replacing packing nuts requires access to the interior of the faucet. Follow these steps:
- Turn off the water supply to the faucet.
- Remove the handle and spout, exposing the stem and packing nut.
- Use a wrench to loosen and remove the packing nut. Be careful not to damage the stem.
- Install the new packing nut onto the stem, ensuring it is securely tightened.
- Reassemble the faucet, attaching the handle and spout.
- Turn on the water supply and test for leaks.
Tightening the Mounting Nut
If you suspect a loose mounting nut is causing the leak, you can tighten it with a wrench. Be careful not to overtighten the nut, as this could damage the faucet.

How To Fix A Dripping Moen Faucet Howtolou Com

How To Fix A Leaky Moen Faucet Fast And Easy Cartridge Replacement

How To Repair Moen Bathroom Faucet Dripping Water Cartridge Removal Replace Single Lever

How To Fix A Leaky Faucet Kitchen Repair Moen Bathroom Faucets

Moen Faucet Leak Fix Made Easy And Free

How To Remove Moen Bathroom Faucet Handle In 2 Steps

How To Fix A Leaky Moen Faucet Fast And Easy Cartridge Replacement

How To Replace A Moen Cartridge And Fix Leaky Bathtub Faucet It Tutorials

Fix A Leaky Moen Bathroom Faucet In Less Than 15 Minutes

How To Fix Moen Single Handle Faucets
Related Posts


