Essential Steps for Removing Moen Bathroom Faucet Handles
Moen bathroom faucets are renowned for their durability and stylish designs. However, there may come a time when you need to replace a worn-out handle or address a leak. Removing Moen faucet handles is a relatively straightforward process that can be accomplished with a few simple tools.
Step 1: Gather Your Tools
To remove a Moen bathroom faucet handle, you will need the following tools:
- Adjustable wrench
- Allen wrench (hex key)
- Phillips screwdriver
- Soft cloth or towel
Step 2: Identify the Handle Type
Moen bathroom faucets come with two main types of handles: lever-style and knob-style. The removal process varies slightly depending on the handle type.
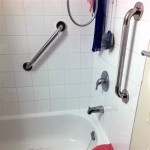
Lever-Style Handles
For lever-style handles, locate the small plastic cap on the top of the handle. Use a Phillips screwdriver to remove the cap and reveal the screw underneath. Remove the screw with the Allen wrench.
Knob-Style Handles
For knob-style handles, remove the decorative cap on the top of the handle. This cap is usually held in place by a small Allen screw. Remove the screw with the Allen wrench and lift the cap off.
Step 3: Loosen the Set Screw
Once the handle cap is removed, you will see a small set screw on the bottom of the handle. Use the Allen wrench to loosen the set screw. Do not remove it completely at this point.
Step 4: Pull the Handle Off
With the set screw loosened, gently pull the handle straight up to detach it from the faucet body. Use a soft cloth or towel to protect the handle from scratches.
Step 5: Remove the Cartridge (Optional)
In some cases, you may need to remove the cartridge to access the handle fully. To do this, loosen the packing nut at the base of the faucet body using the adjustable wrench. Once the packing nut is loose, pull the cartridge straight up to remove it.
Step 6: Clean the Surfaces
Before reinstalling the handle, take a moment to clean the surfaces of the faucet body and the handle. This will help to ensure a proper seal and prevent leaks.
Step 7: Reinstall the Handle
To reinstall the handle, align it with the faucet body and gently push it down. Tighten the set screw using the Allen wrench to secure the handle in place. Replace the handle cap and any decorative trim.
Tips:
- If the handle is stuck, try applying penetrating oil to the set screw and letting it sit for a few minutes before loosening.
- Be careful not to overtighten the set screw, as this can damage the handle or the faucet body.
- If you are replacing the cartridge, make sure to use a genuine Moen cartridge for best performance.
- If you encounter any difficulties during the removal process, do not hesitate to contact a licensed plumber for assistance.

How To Remove Moen Bathroom Faucet Handle In 2 Steps

Moen 4570 Handle Fell Off But Then I Fixed It Here S How

How Do I Replace My Moen Bathroom Faucet Cartridge

How To Remove A Moen Faucet Handle Quora

Tighten A Loose Lever On Moen Brantford Faucet

Moen Bathtub Faucet Handle Repair

Moen Eva 4 In Centerset 2 Handle High Arc Bathroom Faucet Chrome 6410 The Home Depot

How To Fix A Leaking Faucet Without In The Handle Moen

Moen Cau 2 Handle Low Arc Roman Tub Faucet Trim Kit In Chrome Valve Not Included T990 The Home Depot

How To Fix A Dripping Moen Faucet Howtolou Com