Understanding Moen Bathroom Shower Faucet Parts Diagrams
Moen is a recognized leader in the plumbing industry, known for its quality and innovative bathroom fixtures. Understanding the inner workings of a Moen shower faucet, facilitated by a parts diagram, is crucial for both installation and repair. This article will explore the importance and utility of Moen bathroom shower faucet parts diagrams, discussing the common components found within these diagrams and how to effectively utilize them.
A Moen bathroom shower faucet parts diagram serves as a visual roadmap to the internal mechanisms of the faucet. These diagrams provide a detailed exploded view of the faucet, illustrating how each individual component interacts with the others. This detailed illustration is invaluable for troubleshooting leaks, replacing worn parts, and understanding the faucet's overall function.
Locating the appropriate Moen bathroom shower faucet parts diagram is the first step in utilizing this resource. Moen provides comprehensive support on their official website. Users can typically locate the diagram by searching for the model number of their faucet. This model number is usually found on the faucet itself or on the original packaging. Alternatively, contacting Moen customer service can also assist in obtaining the correct diagram.
Once the diagram is obtained, it's important to familiarize oneself with the common components depicted. While specific parts may vary based on the faucet model, several key components are commonly found across Moen shower faucets. These include the cartridge, which controls the flow and temperature of the water; the handle, responsible for operating the cartridge; the escutcheon plate, which provides a decorative cover and mounting point; and the various O-rings, seals, and washers that ensure a watertight connection between components.
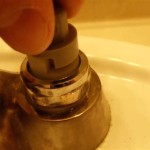
The cartridge is often considered the heart of the Moen shower faucet. This valve mechanism mixes hot and cold water to achieve the desired temperature and controls the water flow rate. Moen utilizes different cartridge designs, including the 1222, 1225, and 1255 cartridges, among others. The parts diagram clearly identifies the specific cartridge used in a particular faucet model, which is essential information when purchasing replacement parts.
O-rings, seals, and washers play a critical role in preventing leaks. These small but essential components create watertight seals between different parts of the faucet. The parts diagram clearly illustrates the location and type of each O-ring, seal, and washer, allowing for accurate identification and replacement when necessary.
Utilizing the Moen bathroom shower faucet parts diagram effectively involves more than just identifying components. It requires a systematic approach to troubleshooting and repair. Begin by identifying the specific problem, whether it's a leak, low water pressure, or a malfunctioning handle. Then, consult the diagram to pinpoint the likely source of the issue. The diagram can help trace the flow of water and identify the components involved in the malfunction.
When disassembling the faucet, refer to the parts diagram to understand the order in which parts should be removed. This is crucial for avoiding damage to the faucet and ensuring a smooth reassembly process. Keep track of the removed parts and their orientation, referencing the diagram as needed. This organized approach simplifies the reassembly process and minimizes the risk of losing or misplacing components.
The parts diagram also facilitates accurate ordering of replacement parts. By referencing the diagram and identifying the specific part numbers, the correct replacement parts can be ordered with confidence, eliminating the guesswork and ensuring compatibility with the faucet model.
Beyond repairs, Moen bathroom shower faucet parts diagrams can be invaluable during installation. While professional installation is always recommended, understanding the diagram can assist homeowners in overseeing the process and ensuring the correct installation of all components. The diagram can also be a valuable tool for DIY enthusiasts who choose to install their own faucets.
Regular maintenance can significantly extend the lifespan of a Moen shower faucet. The parts diagram can be used as a guide for periodic inspections and cleaning. By understanding the location and function of various components, users can identify potential issues early on and take preventative measures to avoid costly repairs down the line.
In conclusion, the Moen bathroom shower faucet parts diagram is an indispensable resource for both professionals and homeowners. It provides a detailed visual representation of the faucet's internal components, facilitating troubleshooting, repair, installation, and maintenance. By understanding and effectively utilizing this resource, users can ensure the optimal performance and longevity of their Moen shower faucets.

Exploded Parts Moen

Moen 82498srn Tub And Shower Faucet Ereplacementparts Com

90 S Moen Cau Shower Valve Terry Love Plumbing Advice Remodel Diy Professional Forum Faucet Handles

Moen 82912srn Tub And Shower Faucet Ereplacementparts Com

Moen T2152bn Tub And Shower Faucet Ereplacementparts Com

Tub Shower 2200 2400 Series Valve Best Plumbing Specialties

Moen T6305 Parts List And Diagram Ereplacementparts Com Faucet Bathroom Faucets

Moen T3124cp Tub And Shower Faucet Ereplacementparts Com

Moen 82137srn Graeden Tub Amp Shower Faucet Valve Magnetic Head Brushed Nickel

Moen 100710 Posi Temp One Handle Tub And Shower Replacement Knob Kit White Chrome Insert Com
Related Posts