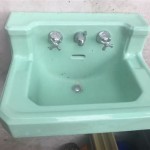
Painting Bathroom Sinks and Tubs: Essential Aspects to Consider
In pursuit of a refreshed and rejuvenated bathroom, painting bathroom sinks and tubs has emerged as a popular DIY project. However, achieving a professional-looking finish requires meticulous attention to essential aspects, including preparation, material selection, application techniques, and post-painting care.
This comprehensive guide will delve into each of these essential aspects, providing you with the knowledge and expertise to transform your bathroom with confidence. From selecting the right paint to ensuring a smooth and durable finish, we will cover every step of the process in detail, empowering you to achieve the desired outcome.
Surface Preparation: The Foundation for Success
Begin by thoroughly cleaning the sink or tub surface to remove any dirt, grime, or residue. Utilize a degreasing cleaner specifically designed for bathroom surfaces to eliminate any traces of soap scum or oils. Next, sand the surface lightly using fine-grit sandpaper to create a slightly rough texture that will enhance paint adhesion.
Material Selection: Choosing the Right Paint
Opt for a paint specifically formulated for bathroom use. These paints are designed to withstand moisture and humidity, preventing peeling or chipping. Select between water-based or oil-based paints based on personal preference and project requirements. Water-based paints are easier to clean up and have less odor, while oil-based paints offer better durability and a smoother finish.
Application Techniques: Precision and Care
Apply several thin coats of paint, allowing each coat to dry completely before applying the next. Use a high-quality brush or roller for smooth and even application. Start from the edges and corners, working towards the center. Avoid overbrushing to prevent lines or streaks in the paint finish.
Post-Painting Care: Preserving the Finish
Allow the final coat of paint to cure for at least 24 hours before using the sink or tub. Keep the area well-ventilated during this time to promote proper drying. Once fully cured, apply a sealant to enhance the durability of the paint finish and protect it from water damage.
By meticulously following these essential aspects of painting bathroom sinks and tubs, you can achieve a professional-looking and long-lasting finish. Remember, preparation is paramount, material selection is crucial, application requires precision, and post-painting care ensures durability. With attention to detail and a touch of DIY spirit, you can transform your bathroom into a refreshed and rejuvenated space.

How To Paint A Sink It All Started With

Paint Bathroom Vanity Countertop Sink So Easy A Piece Of Rainbow

Diy Painted Bathtub Follow Up Your Questions Answered Addicted 2 Decorating

Paint Bathroom Vanity Countertop Sink So Easy A Piece Of Rainbow

Transform Your Bathroom With Sink Paint The Honeycomb Home

Paint Bathroom Vanity Countertop Sink So Easy A Piece Of Rainbow

How To Paint A Sink It All Started With

The Best Way To Spray Paint A Faucet Average But Inspired

Painted Bathroom Sink And Countertop Makeover Remodelaholic
.gif?strip=all)
Painting A Bathroom Vanity Again Dream Green Diy
Related Posts


