Removing Grohe Bathroom Faucet Handle Replacement Parts
Essential aspects of removing Grohe bathroom faucet handle replacement parts are crucial to ensure a successful repair. Understanding the part of speech of 'Remove Grohe Bathroom Faucet Handle Replacement Parts' helps grasp its function and significance in the context. This article will delve into the vital components and steps involved in the removal process. ### Essential Aspects of RemovalRemoving Grohe bathroom faucet handle replacement parts requires careful attention to several key aspects: selecting the appropriate tools, understanding the faucet's design, identifying the handle type, and following the correct removal procedures. Each step plays a vital role in ensuring a smooth and effective replacement.
### Selection of ToolsHaving the right tools for the job is essential. A hex key or Allen wrench, adjustable wrench, and flat-head screwdriver are typically sufficient for most Grohe faucet handle removals. Choosing the correct size hex key is crucial to avoid damaging the screws.
### Understanding Faucet DesignGrohe faucets come in various designs and models. Familiarizing yourself with the specific faucet type is important to determine the best approach for handle removal. Some faucets feature a set screw located under a cap, while others may have a handle held in place by a hex screw or a cartridge that requires specific removal techniques.
### Identifying Handle TypeGrohe bathroom faucet handles come in two main types: lever handles and cross handles. Lever handles are usually removed by unscrewing a set screw, while cross handles require the removal of a hex screw or cartridge.
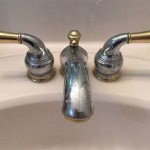
### Removal ProceduresThe actual removal process varies slightly depending on the handle type and faucet design. In general, locate the set screw or hex screw and carefully unscrew it using the appropriate tool. Grip the handle firmly and gently pull it towards you to detach it from the cartridge or stem.
### ConclusionRemoving Grohe bathroom faucet handle replacement parts is a manageable task with a clear understanding of the essential aspects involved. By carefully selecting tools, understanding faucet design, identifying handle type, and following proper removal procedures, you can effectively replace your Grohe faucet handle.
This article has outlined the critical components and steps necessary for a successful removal. With patience and attention to detail, you can restore your faucet to optimal functionality.

My Grohe Ladylux Faucet Leaks And I Can T Remove The Lever Doityourself Com Community Forums

How To Take Apart A Grohe Bathroom Faucet Mr Kitchen Faucets

Repair Parts For Grohe Kitchen Faucets

Repair Parts For Grohe Kitchen Faucets

Repair Parts For Grohe Kitchen Faucets

Grohe Faucet Handle Keeps Moving The Wrong Way

Home Repair Grohe Warranty Not Honored Kitchen Faucet Single Handle Replace Cartridge By Froggy

Repair Parts For Grohe Kitchen Faucets

Grohe Faucet Handle Keeps Moving The Wrong Way

Single Hole Handle Xs Size Bathroom Faucet 1 2 Gpm
Related Posts