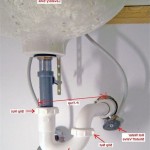
Removing a Delta Bathroom Sink Drain
Delta faucets are known for their quality and durability. However, like all plumbing fixtures, they eventually require maintenance or replacement. Removing a Delta bathroom sink drain is a common plumbing task that, with the right tools and approach, most homeowners can accomplish themselves. This article provides a step-by-step guide to facilitate this process.
Before beginning any plumbing work, safety should be the primary concern. Always turn off the water supply to the sink. This is typically achieved by locating the shut-off valves under the sink. Turn these valves clockwise until they stop. Once the water is off, turn on the faucet to ensure the water flow has ceased completely. Place a bucket or towel under the sink to catch any residual water.
The next step involves identifying the type of drain assembly. Delta utilizes various drain designs. The most common are pop-up drains with a pivot rod and push-down drains with a clevis strap. Understanding the specific drain assembly type is crucial for proper removal.
For pop-up drains with a pivot rod, the first step is to disconnect the pivot rod from the drain stopper. This is typically done by removing a small setscrew located at the back of the pivot rod, near the lift rod linkage under the sink. Once the setscrew is removed, the pivot rod can be detached from the linkage. Next, locate the nut that secures the drain flange to the sink. This nut is located on the underside of the sink, directly below the drain. Using pliers or a basin wrench, loosen and remove this nut.
With the nut removed, the drain flange, which includes the drain body and the pop-up stopper, can be lifted out of the sink. Clean any old putty or plumber's tape from around the drain opening. Sometimes, the drain body might be difficult to remove due to corrosion or buildup. Penetrating oil can be applied to loosen the connection. Allow the oil to sit for a few minutes before attempting removal again. Be careful not to scratch the sink's surface during this process.
For push-down drains with a clevis strap, the removal process is slightly different. First, locate the clevis strap, a metal strap that connects the drain stopper to the drain body. This strap is usually located at the back of the drain assembly, under the sink. Carefully disconnect the clevis strap from the drain stopper. This may involve removing a clip or pin, depending on the specific design. Once the clevis strap is detached, the drain flange and drain body can be removed using the same method as with the pop-up drain, by loosening and removing the nut under the sink.
Another type of drain assembly less common in modern Delta sinks, but still encountered in older models, is the lift-and-turn drain. These drains have a stopper that is lifted and turned to open and close the drain. To remove this type, lift the stopper to its open position. Then, turn the stopper counterclockwise to unscrew it from the drain body. Once the stopper is removed, the drain flange can be removed by loosening the nut under the sink, as with the other drain types.
After removing any drain type, it is essential to clean the drain opening thoroughly. Remove any old putty, sealant, or debris to ensure a proper seal when installing a new drain. Inspect the condition of the tailpiece, the pipe extending down from the drain body, and replace it if necessary.
While these instructions cover the most common Delta drain types, some variations may exist. Consulting the specific installation instructions for your Delta faucet model can provide additional guidance. These instructions are often available on the Delta Faucet website. Photographs or diagrams of the drain assembly can be particularly helpful in identifying components and understanding the removal process. If there is any uncertainty about any step in the process, contacting a qualified plumber is recommended to avoid potential damage to the sink or plumbing system.
Having the necessary tools on hand before beginning the process simplifies the task. Commonly required tools include pliers, a basin wrench, a screwdriver, and possibly penetrating oil. A basin wrench is especially helpful for accessing the tight space under the sink to remove the drain flange nut. Keeping a bucket or towel handy for catching spills or residual water is also advisable.
Finally, properly disposing of the old drain components is important. Check local regulations for proper disposal methods. Some materials might be recyclable, while others might require specific disposal procedures. By following these steps and taking necessary precautions, removing a Delta bathroom sink drain can be accomplished efficiently and effectively.
Install A Drain Stopper So The Is Removable

How To Remove A Delta Sink Stopper Step By

How To Remove A Delta Bathroom Sink Pop Up Stopper Hunker

How To Install A Delta Pop Up Sink Drain

Tips Tricks Remove Delta 2 Handle 4 In Bathroom Sink Faucet With Bar 5 21 18

Learnbyblogging Com

How To Install A Delta Pop Up Sink Drain

Drain Assembly Metal Pop Up Bathroom In Chrome Rp5651 Delta Faucet

Simple Ways To Fix A Leaky Delta Bathroom Sink Faucet

How To Repair Leaking Dripping Delta Faucet Diyplumbing Serviceplumbing Tappplumbing
Related Posts


