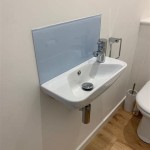
Essential Aspects of Removing Bathroom Sink Cartridge
Removing a bathroom sink cartridge is a critical aspect of sink maintenance and repair. Understanding the essential aspects of this process ensures a smooth and effective cartridge removal, preventing further damage to your sink. This article explores the key steps and considerations involved in removing a bathroom sink cartridge.
Identifying the Cartridge Type
The first essential aspect is identifying the type of cartridge in your sink. Different sink models require different cartridge types, so it's crucial to consult your sink's manual or consult with a qualified plumber. Cartridge types include compression, disc, and ceramic.
Gathering Necessary Tools
Before attempting to remove the cartridge, gather the necessary tools. These typically include a basin wrench, adjustable wrench, and a pair of pliers. Ensuring you have the appropriate tools will prevent unnecessary delays or damage to your sink.
Safety Precautions
Safety should always be a priority when performing any maintenance or repair task. Before starting, turn off the water supply to the sink and open the faucet to release residual water pressure. Wear safety glasses to protect your eyes from any debris or water splashes.
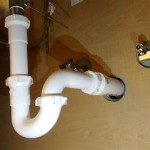
Access the Cartridge
Depending on the sink model, you may need to remove the faucet handles or aerator to access the cartridge. Use the basin wrench to loosen the handle or aerator, and remove it carefully. Once the handles or aerator are removed, you should have clear access to the cartridge.
Removing the Cartridge
Using the adjustable wrench, grasp the cartridge and turn it counterclockwise to loosen it. Some cartridges have a locking nut that needs to be loosened before the cartridge can be removed. Once loosened, gently pull the cartridge straight up and out of the sink.
Inspecting and Replacing
Before installing a new cartridge, inspect the old one for any damage or wear. If necessary, replace the old cartridge with a new one of the same type. Align the new cartridge correctly and insert it into the sink. Tighten it securely using the adjustable wrench.
Conclusion
Removing a bathroom sink cartridge is a straightforward process when you understand the essential aspects and follow the steps carefully. Identifying the cartridge type, gathering the necessary tools, taking safety precautions, accessing the cartridge, and removing and replacing it ensures a successful cartridge removal. By following these aspects, you can effectively maintain your sink and avoid costly repairs in the future.

Bathroom Faucet Cartridge Replacement

How To Replace Repair A Leaky Moen Cartridge In Bathroom Set Of Faucets Single Lever Tips

How To Fix A Leaky Faucet Handle

Gerber How To Install A Cartridge

Quickly Replace A Leaky Faucet Cartridge Diy Family Handyman

Replacing A Faucet Cartridge Elkay S Step By Guide

How To Fix A Leaky 2 Handle Faucet Replace Bathroom Sink Repair

Replace Bathroom Faucet Cartridge Doityourself Com Community Forums

How Do I Replace My Moen Bathroom Faucet Cartridge

How To Remove And Install A Bathroom Faucet
Related Posts