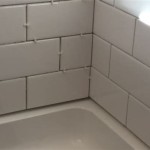
Removing Broken Bathroom Wall Tile: A Comprehensive Guide
Broken bathroom wall tiles are a common problem, often caused by accidental impacts, age, or improper installation. While replacing these tiles can be a challenging task, it's a DIY project that can be tackled with the right tools and techniques. This guide provides a step-by-step process for removing broken bathroom wall tiles efficiently and safely.
1. Gather Essential Tools and Materials
Before starting the removal process, gather the necessary tools and materials. This will ensure a smooth and efficient operation. You will need:
- Safety Glasses
- Gloves
- Dust Mask
- Pry Bar
- Hammer
- Chisel
- Utility Knife
- Bucket
- Sponge
- Cleaning Solution
- New Tile
- Thin-set Mortar
- Grout
- Tile Spacers
Having all these tools readily available will minimize interruptions during the project.
2. Prepare the Area
Before starting the removal process, it's essential to prepare the work area. This involves clearing the surrounding space of any obstacles and protecting the floor from debris. These steps will ensure a safe and organized work environment.
- Clear the area: Remove any furniture, fixtures, or other items that may be in the way of the work area. This will provide ample space to work and prevent accidental damage.
- Protect the floor: Cover the floor around the broken tiles with a drop cloth or plastic sheeting to protect it from falling debris and tile fragments.
- Turn off water supply: If the broken tile is located near a plumbing fixture, turn off the water supply to avoid accidental flooding during the removal process.
These preliminary steps will set the stage for a safe and efficient removal process.
3. Removal Techniques
There are several methods for removing broken tiles. The most effective method depends on the type of tile, the adhesive used, and the extent of the damage. Here are some common techniques:
- Chiseling: For securely adhered tiles, use a chisel and hammer to break the tile into smaller pieces. Place the chisel at the edge of the tile and strike it with the hammer, gradually breaking it apart.
- Pry Bar: If the tile is loose or has a gap between it and the wall, use a pry bar to lift it off. Insert the pry bar under the tile and gently lever it up.
- Utility Knife: For thin tiles, use a utility knife to score the tile’s surface. This will create weak points that will make it easier to break the tile into smaller pieces.
Always wear safety glasses and gloves when using these tools to protect yourself from injuries.
4. Remove the Old Adhesive
Once the tile is removed, you need to remove the old adhesive from the wall. This can be a tedious process, but it's crucial for a smooth installation of the new tile.
- Scrape the adhesive: Use a scraper or putty knife to remove as much of the old adhesive as possible. Be careful not to damage the surrounding tiles or walls.
- Use a solvent: If the adhesive is stubborn, use a solvent specifically designed for tile removal. Apply the solvent according to the manufacturer's instructions and allow it to soak for a few minutes before scraping off the adhesive.
After removing the old adhesive, clean the wall thoroughly with water and a sponge to remove any remaining residue.
5. Prepare the New Tile
Before installing the new tile, prepare it by ensuring it's clean and free of any imperfections. This will ensure a smooth installation and a uniform finish.
- Clean the tile: Use a damp cloth or sponge to clean the surface of the new tile, removing any dust or debris.
- Inspect for defects: Check the new tile for any chips, cracks, or other defects that may affect its installation or durability.
By preparing the new tile, you can ensure it will properly adhere to the wall for a lasting installation.
6. Install the New Tile
Once the old tile is removed and the wall is prepared, you can proceed with installing the new tile. This process involves applying adhesive to the wall, positioning the tile, and ensuring it is properly aligned.
- Apply adhesive: Spread a thin layer of thin-set mortar onto the wall, ensuring it covers the area where the new tile will be placed.
- Position the tile: Place the new tile in the desired location, pressing it firmly onto the adhesive. Use a level to ensure the tile is straight and aligned.
- Use spacers: Place tile spacers between the new tile and the surrounding tiles to maintain consistent grout lines.
- Allow the adhesive to cure: Allow the adhesive to cure according to the manufacturer's recommendations before proceeding to the next step.
Following these steps will ensure a secure and aesthetically pleasing installation of the new tile.
7. Grout the Tiles
Once the adhesive is cured, you can grout the tiles. This helps to seal the gaps between them, preventing water penetration and creating a clean and polished finish.
- Prepare the grout: Mix the grout powder with water according to the manufacturer's instructions.
- Apply the grout: Use a rubber trowel to apply the grout to the gaps between the tiles, ensuring it fills them completely.
- Wipe excess grout: Use a damp sponge to wipe away excess grout from the tile surface, ensuring a smooth and even finish.
- Allow the grout to cure: Allow the grout to cure completely before using the shower or tub.
Grouting is a crucial step that adds both aesthetic appeal and functionality to the tile installation.

How To Repair Ed Tiles Remove And Replace

Easy Diy Guide On Removing Tiles From Walls Fantastic Handyman Au

How To Remove Replace One Bathroom Tile Ceramic Repair

Why Ed Tiles In Your Bathroom Are A Problem Shower Sealed

How To Cover Damaged Bathroom Walls On A Budget

Preparing Walls For Tiling Removing Old Tiles Bathroom Guru

Tips On How To Remove Old Shower Tile Ugly Duckling House

How To Remove Replace Broken Tiles Eurotiles Bathrooms

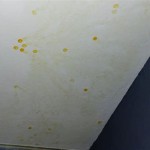
Water Damage Behind Shower Tiles

How To Remove Replace Broken Tiles Eurotiles Bathrooms
Related Posts