Repairing a Leaky Delta Bathroom Faucet: A Comprehensive Guide
A leaky bathroom faucet is not just annoying; it can also waste water and increase your utility bills. If you're facing this problem with your Delta bathroom faucet, don't worry; it's a common issue that can be easily repaired with the right tools and instructions.
In this article, we'll provide a step-by-step guide on how to repair a leaky Delta bathroom faucet. We'll cover the necessary tools, identify the common causes of leaks, and provide detailed instructions for each repair scenario.
Tools You'll Need
- Allen wrench (hex key)
- Phillips head screwdriver
- Flathead screwdriver
- Adjustable wrench
- Replacement parts (if necessary)
Common Causes of Delta Bathroom Faucet Leaks
- Worn-out O-rings or washers
- Damaged cartridge
- Loose handle
- Cracked or leaking supply lines
Repair Instructions for Common Leak Scenarios
Scenario 1: Leaking from the Handle
Cause: Loose handle or worn-out O-rings.
- Remove the handle by loosening the set screw with an Allen wrench.
- Check the O-rings for wear or damage. If necessary, replace them with new ones.
- Tighten the set screw to secure the handle back in place.
Scenario 2: Leaking from the Base of the Faucet
Cause: Damaged cartridge or worn-out O-rings.
- Remove the faucet handle as described in Scenario 1.
- Use an adjustable wrench to loosen the cartridge nut.
- Pull out the cartridge and inspect for damage. If damaged, replace it with a new one.
- Replace any worn-out O-rings.
- Install the new cartridge and tighten the cartridge nut.
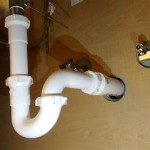
Scenario 3: Leaking from the Supply Lines
Cause: Loose or cracked supply lines.
- Turn off the water supply to the faucet.
- Disconnect the supply lines using an adjustable wrench.
- Inspect the supply lines for cracks or damage. Replace if necessary.
- Reattach the supply lines and tighten them securely.
- Turn on the water supply and check for leaks.
Additional Tips
- Before starting any repairs, make sure to turn off the water supply to the faucet.
- Use the appropriate tools for each task to avoid damaging the faucet.
- If you are uncomfortable performing the repairs yourself, call a licensed plumber for assistance.
- Regular maintenance can help prevent future leaks. Inspect your bathroom faucet periodically for any loose connections or worn-out parts.

Simple Ways To Fix A Leaky Delta Bathroom Sink Faucet

How To Repair Leaking Dripping Delta Faucet Diyplumbing Serviceplumbing Tappplumbing

Simple Ways To Fix A Leaky Delta Bathroom Sink Faucet

How To Fix A Leaky Delta Style Bathroom Faucet

Simple Ways To Fix A Leaky Delta Bathroom Sink Faucet

Sink Faucet Repair Delta Bathroom Drips

Simple Ways To Fix A Leaky Delta Bathroom Sink Faucet

Repairing A Leaky Delta Bath Or Shower Faucet Single Lever And Setting Temp

How To Fix A Leaking Bathroom Faucet Quit That Drip

Old Delta Shower Faucet Repair Made Easy