Replacing Bathroom Sink Drain Plumbing: A Comprehensive Guide to Essential Aspects
Replacing a bathroom sink drain plumbing system can seem like a daunting task, but with the right knowledge and preparation, it can be a straightforward process. This guide will provide you with a comprehensive overview of the essential aspects of replacing bathroom sink drain plumbing, ensuring a successful and hassle-free installation.
Tools and Materials Required:
- Adjustable wrench
- Slip-joint pliers
- Plumber's putty
- New drain assembly
- Replacement pop-up stopper (if necessary)
Step 1: Disassembling the Existing Drain
Begin by turning off the water supply beneath the sink. Place a bucket or container below the drain to catch any water or debris. Using the adjustable wrench, loosen the slip nut that connects the tailpiece to the sink drain. Remove the tailpiece and disconnect the drain assembly from the sink flange.
Step 2: Preparing the Sink Flange
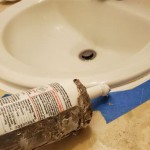
Clean the sink flange thoroughly, removing any old plumber's putty or debris. Apply a thin bead of new plumber's putty around the base of the flange.
Step 3: Assembling the New Drain
Insert the new drain assembly into the sink flange. Align the drain holes and tighten the lock nut securely using the adjustable wrench. Do not overtighten.
Step 4: Installing the Tailpiece
Connect the tailpiece to the drain assembly and tighten the slip nut using the adjustable wrench or slip-joint pliers. Ensure that the connection is snug, but not overly tight.
Step 5: Installing the Pop-up Stopper (If Applicable)
If your sink has a pop-up stopper, attach the new stopper to the drain assembly by inserting it into the hole and tightening the retaining nut. Align the stopper rod with the lift rod and connect them.
Step 6: Reconnecting the Water Supply
Turn on the water supply and check for any leaks around the connections. If there are leaks, tighten the connections as needed.
Step 7: Final Inspection
Once the plumbing is complete, run water into the sink and check for proper drainage. The water should flow smoothly and the pop-up stopper should function correctly.
Tips:
- Use a flashlight to inspect tight spots.
- Do not use excessive force when tightening connections.
- If you encounter any difficulties, consult a professional plumber.
- Replace the drain assembly every few years to prevent leaks and ensure optimal performance.

How To Install A Bathroom Sink Drain With Faucet Macy Bath Co Ltd

How To Install A Pipe From Sink Drain Wall Ehow

How To Replace A Bathroom Sink Drain

Bianchina Swapping Out A Bathroom Sink Drain And Pop Up

How To Replace A Sink Stopper Quick And Simple Home Repair

How Replace A Bathroom Sink Drain

How To Install Bathroom Sink Drain Queen Bee Of Honey Dos

How To Replace A Rusty Sink Drain Howtolou Com

How To Replace A Sink Stopper Quick And Simple Home Repair

Avoiding The Common Mistakes Of Installing New Drain In Sink