Essential Aspects of Replacing Bathroom Sink Fixtures
Revitalizing your bathroom's aesthetics and functionality often involves replacing outdated sink fixtures. This seemingly simple task requires careful planning and execution to ensure a seamless and successful outcome. Here's a comprehensive guide to the essential aspects of replacing bathroom sink fixtures:
1. Choosing the Right Fixtures
Before delving into the replacement process, selecting the appropriate fixtures is crucial. Consider the following factors:
- Sink Type: Opt for a drop-in, undermount, or vessel sink that complements your vanity and bathroom décor.
- Faucet Design: Choose a faucet with a single handle, double handles, or a touchless option that suits your style and water conservation preferences.
- Material: Consider materials like porcelain, stainless steel, or stone that align with your durability and aesthetic preferences.
2. Preparing for Replacement
Adequately prepare for the replacement process by gathering necessary tools, clearing the work area, and isolating the water supply.
- Tools: Ensure you have pliers, a wrench, a screwdriver, and a utility knife.
- Clear the Area: Remove any objects or clutter around the sink to create a comfortable workspace.
- Isolate Water: Turn off the water supply valves located beneath the sink or at the main water shut-off valve.
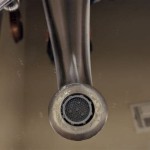
3. Disconnecting Existing Fixtures
Carefully disconnect the existing fixtures to avoid damage.
- Sink: Loosen the mounting hardware and remove the sink from the vanity top.
- Faucet: Unscrew the nuts or bolts that secure the faucet to the sink and disconnect the water supply lines.
- Drain Components: Remove the drain plug and pop-up assembly to expose the drainpipe.
4. Installing New Fixtures
With the old fixtures removed, install the new ones following these steps:
- Sink: Place the new sink in the vanity top and secure it with the mounting hardware.
- Faucet: Connect the faucet to the sink and water supply lines, ensuring a proper seal.
- Drain Components: Insert the drainpipe, attach the pop-up assembly, and install the drain plug.
5. Final Touches
Complete the installation with these finishing touches:
- Caulking: Apply a bead of caulk around the sink's perimeter and the faucet base to prevent water damage.
- Turn on Water: Slowly turn on the water supply and check for any leaks.
- Final Adjustments: Adjust the faucet handles or spout as needed to ensure proper water flow and temperature.

Diy How To Replace A Bathroom Sink Faucet Remove Install

How To Replace A Bathroom Faucet Tinged Blue

How To Replace A Bathroom Faucet Home Repair Tutor

How To Replace A Bathroom Faucet Tinged Blue

Replacing A Bathroom Faucet Fine Homebuilding

How To Replace A Bathroom Faucet Home Repair Tutor

How To Remove And Install A Bathroom Faucet

How To Remove And Install A Bathroom Faucet

How To Remove And Install A Bathroom Faucet

Removing And Installing Bathroom Faucets The Lazy Way Makely
Related Posts