Replacing a Bathroom Tap Cartridge: A Step-by-Step Guide
A faulty bathroom tap cartridge can lead to frustrating leaks, drips, and temperature issues. Replacing the cartridge is often the most effective and economical solution. Here's a detailed guide to help you tackle this plumbing project with ease.
Tools and Materials
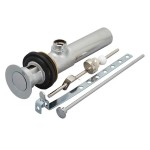
- Replacement tap cartridge (specific to your tap model)
- Adjustable wrench or spanner
- Phillips head screwdriver
- Flathead screwdriver or Allen key (for stop valves)
- Cloth or towels
Safety Precautions
Before you begin, it's crucial to take these safety precautions:
- Turn off the water supply at the stop valves under the sink or at the main water valve.
- Open the tap to release any remaining water in the pipes.
- Protect the work area with cloths or towels to prevent water damage.
Step-by-Step Instructions
1. Remove the Tap HandleLocate the small screw or cap securing the tap handle. Remove it using a Phillips head screwdriver or Allen key. Gently pull the handle straight up to detach it.
2. Remove the Cartridge Retaining NutUnder the handle, you'll find a retaining nut. Use an adjustable wrench to loosen and remove this nut counterclockwise. Be careful not to overtighten.
3. Extract the Old CartridgeOnce the retaining nut is removed, you can pull the old cartridge straight out of the tap body. If it's stuck, gently pry it loose with a flathead screwdriver.
4. Install the New CartridgeAlign the new cartridge with the tap body and carefully insert it into place. Ensure it's properly seated.
5. Tighten the Cartridge Retaining NutHand-tighten the cartridge retaining nut onto the tap body. Use the adjustable wrench to further tighten it clockwise, but avoid overtightening.
6. Reinstall the Tap HandlePosition the tap handle on the stem and push it down until it's secure. Screw the handle fixing screw or cap back in place.
7. Turn On the WaterTurn the water supply back on at the stop valves or main water valve. Open the tap and check for any leaks. Adjust the cartridge further if necessary.
Tips
- Identify the correct replacement cartridge for your tap model by consulting the manufacturer's guide or visiting a hardware store.
- If your tap has separate handles for hot and cold water, repeat the process for both sides.
- Use a new retaining nut to ensure a tight seal and prevent leaks.
- If you encounter difficulties, don't hesitate to consult a licensed plumber for assistance.
Conclusion
Replacing a bathroom tap cartridge is a manageable task for DIY enthusiasts with basic plumbing knowledge. By following the steps outlined above and taking the necessary safety precautions, you can restore your tap to its optimal functionality.

Replacing A Cartridge In Mixer Tap The

Tap Cartridge Replacement Guide Step By

Identify Your Tap Cartridge Replacing Valves Cartridges Notjusttaps Co

Bathroom Faucet Cartridge Replacement

Fixing Faucets How To Replace A Difficult Tub Faucet Cartridge

Upperplumbers Short Bath Ceramic Cartridges 24 Spline 62003097 89 Replacement Jpg

How To Replace Your Tap Valve In Kitchen Or Bathroom
-153881-1-p.jpg?strip=all "Sottini Mazaro Replacement 1 2 Cold Basin Tap Cartridge H960136nu")
Sottini Mazaro Replacement 1 2 Cold Basin Tap Cartridge H960136nu

How To Change A Single Lever Basin Cartridge

Hot Cold 1 2 Replacement Tap Cartridges Valve Ceramic 20 Teeth Quarter Turn
Related Posts