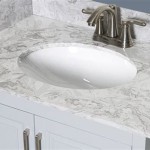
Tighten Moen Bathroom Faucet: A Comprehensive Guide
A loose bathroom faucet not only compromises the overall aesthetics of your bathroom but also leads to water wastage and potential leaks. If your Moen bathroom faucet has become loose, fret not! With a few easy steps, you can tighten it yourself, saving time and money on plumber calls.
Materials You'll Need:
- Adjustable wrench or Allen key
- Pliers (optional)
- Rags or paper towels
- Lubricant (optional)
Step-by-Step Guide to Tighten Moen Bathroom Faucet:
1. Locate the Set Screw: The set screw is typically located on the underside of the faucet handle. If you can't spot it immediately, consult your Moen faucet's manual or search online for specific instructions for your model. 2. Tighten the Set Screw: Using the appropriate Allen key or adjustable wrench, carefully tighten the set screw. Avoid overtightening, as this can damage the screw or handle. If the set screw is inaccessible, use pliers to gently grip the handle and rotate it clockwise to tighten. 3. Check for Snugness: After tightening the set screw, firmly grasp the faucet handle and try to wiggle it side-to-side. If there is any movement, tighten the set screw further until the handle is snug. 4. Remove the Aerator (Optional): If the faucet is still loose after tightening the set screw, it may be necessary to remove the aerator. Attach a wrench to the aerator and unscrew it counterclockwise. 5. Inspect the Washer: Underneath the aerator is a washer that may have become worn or damaged. Replace the washer with a new one if needed. 6. Reinstall the Aerator: Return the aerator to its original position and screw it back in clockwise until hand-tight. 7. Apply Lubricant (Optional): For added durability, you can apply a small amount of lubricant to the set screw or washer before reassembly. This will help prevent future loosening. 8. Double-Check: Once everything is reassembled, try rotating the handle again. If it feels snug and there is no movement, your Moen bathroom faucet is now secure.Tips for Prevention:
* Regularly check your faucet handles for any signs of looseness. * Avoid overtightening the set screw, as this can damage the handle. * If you frequently encounter loose faucet handles, consider replacing the washer or lubricating the set screw and washer. * For extended faucet longevity, adopt a gentle touch when using the handle. Avoid excessive force when turning it on and off. By following these steps, you can successfully tighten your Moen bathroom faucet and restore its optimal functionality. Remember, proper maintenance is crucial for preserving the aesthetics and longevity of your bathroom fixtures.
Tighten A Loose Lever On Moen Brantford Faucet

Tighten A Loose Lever On Moen Brantford Faucet

How To Tighten Moen Bathroom Faucet Handle Bargain

How To Tighten An Old Moen Kitchen Sink Faucet Where The Base Is Loose And Wiggles Around Thinkbox

How To Fix A Dripping Moen Faucet Howtolou Com

6 Simple Steps To Tighten A Loose Moen Kitchen Faucet Base

How To Tighten A Loose Bathroom Faucet

How To Tighten An Old Moen Kitchen Sink Faucet Where The Base Is Loose And Wiggles Around Thinkbox

How To Tighten Faucet Handle Homeserve Usa

How To Tighten A Loose Moen Bathroom Faucet Base