Tile Wall Behind Bathroom Vanity
A tiled wall behind a bathroom vanity offers a blend of practicality and aesthetic appeal. It provides a waterproof surface that protects the wall from splashes and humidity, simplifying cleaning and maintenance while also serving as a focal point for the bathroom design. Choosing the right tile and understanding the installation process is crucial for achieving a durable and visually pleasing result.
Choosing the Right Tile
The vast array of tile options available can make selection seem daunting. Several factors should be considered, including material, size, shape, color, and pattern. Porcelain and ceramic tiles are popular choices due to their durability, water resistance, and affordability. Natural stone tiles, such as marble and granite, add a touch of luxury but require more maintenance and sealing. Glass tiles offer a luminous, reflective quality, while mosaic tiles can create intricate patterns and designs.
Tile size and shape also play a significant role in the overall aesthetic. Large format tiles create a seamless, modern look and can make a small bathroom appear larger. Smaller tiles, like subway tiles or mosaics, offer greater design flexibility and can be used to create intricate patterns or borders. The chosen color and pattern should complement the overall bathroom design and personal style.
Finally, considering the tile's finish is essential. A matte finish offers a more subdued, less slippery surface, while a glossy finish reflects light and creates a brighter, more glamorous feel. Textured tiles add visual interest and can also enhance grip, making them suitable for wet areas.
Preparing for Installation
Proper preparation is key to a successful tile installation. This involves ensuring the wall surface is clean, level, and free of any loose debris. Any existing wallpaper or paint should be removed, and any imperfections in the wall should be repaired using a suitable patching compound. For particularly uneven walls, a layer of cement backer board may be necessary to create a smooth, stable surface for the tiles to adhere to.
Accurate measurements are crucial to determine the required number of tiles and to plan the layout. It's advisable to purchase slightly more tiles than calculated to account for breakage and cuts. Before beginning the tiling process, dry-fitting the tiles is recommended to visualize the final layout and ensure a proper fit, especially around corners and edges.
Finally, gather all necessary tools and materials. This typically includes tile adhesive, grout, spacers, a notched trowel, a tile cutter or wet saw, a grout float, and cleaning supplies. Having everything readily available streamlines the installation process and minimizes disruptions.
Installation Process
The installation process begins with applying a layer of tile adhesive to the wall using a notched trowel. The size of the notches depends on the size and type of tile being used. Begin tiling from the center outward, working in small sections to ensure the adhesive remains workable. Tile spacers are used to maintain consistent spacing between tiles, creating even grout lines.
Once the tiles are set, allow ample time for the adhesive to cure completely. The curing time varies depending on the type of adhesive used and the ambient temperature. After the adhesive has cured, the spacers can be removed, and the grouting process can begin.
Grout is applied using a grout float, pressing it firmly into the gaps between the tiles to fill them completely. Excess grout should be removed with a damp sponge before it dries completely. Once the grout has dried, a grout sealer can be applied to protect it from staining and moisture damage.
Maintenance and Care
Maintaining a tiled wall behind a bathroom vanity is relatively straightforward. Regularly cleaning the tiles with a mild detergent and water will help prevent the buildup of soap scum and grime. Avoid using abrasive cleaners, which can scratch the tile surface. For stubborn stains, a specialized tile cleaner can be used.
Periodically inspecting the grout for cracks or damage is also important. If any damage is found, the damaged grout should be removed and replaced to prevent water from seeping behind the tiles and causing damage to the wall. Resealing the grout every few years can help maintain its water resistance and prevent staining.
By following proper installation and maintenance procedures, a tiled wall behind the bathroom vanity can provide a durable, beautiful, and functional element in the bathroom for years to come. Selecting the right tile and understanding the nuances of installation are critical to achieving a successful and visually appealing outcome.

62 Bathroom Backsplash Ideas For A Stylish Makeover Remodel Tile Vanity

Bathroom Design Getting Tile Around The Vanity Right

Tiled Half Wall Behind Vanity Design Ideas
:max_bytes(150000):strip_icc()/milesminnophotography_118311492_318343026165812_2272495376046156320_n-669492e1adc2421491187072dc287d7e.jpg?strip=all "62 Beautiful Bathroom Tile Ideas For Walls Floors And More")
62 Beautiful Bathroom Tile Ideas For Walls Floors And More

Patterned Tile Backsplash Behind Vanity Cabinet And Mirrors In Bathroom Designs Modern

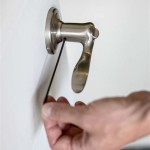
How To Drill Into Tile Hang Things Maison De Pax

Master Bathroom Vanity Makeover Centsational Style

Do Bathroom Vanities Need A Backsplash

Blue Dual Washstand On White And Mosaic Tiled Wall Transitional Bathroom

40 Chic Bathroom Tile Ideas Wall And Floor Designs
Related Posts