Essential Aspects of Tiling Around a Sink in a Bathroom
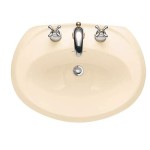
Tiling around a sink in a bathroom is a multifaceted task that involves careful consideration of several essential aspects. These aspects hinge on the style and functionality desired for the space, ensuring a cohesive and visually appealing outcome. This article will explore these key considerations, providing guidance on the materials, techniques, and design elements involved in tiling around a bathroom sink. ### Tile Selection The choice of tiles plays a pivotal role in the overall aesthetic of the bathroom. Consider the size, shape, color, and texture of the tiles to complement the existing décor and create a desired ambiance. Porcelain and ceramic tiles are popular choices due to their durability, water resistance, and ease of maintenance. ### Surface Preparation Proper surface preparation is crucial for the longevity and adhesion of the tiles. Remove any existing tiles or fixtures, ensuring a clean and level surface. Use a cement backer board or drywall to provide a stable base for the tiles. Install the backer board or drywall using screws or nails, ensuring it is securely fastened. ### Dry Fit the Tiles Before applying adhesive, dry fit the tiles to ensure proper alignment and spacing. This step allows for adjustments to be made before the adhesive sets. Use spacers to ensure uniform grout lines and prevent tiles from shifting during installation. ### Apply Adhesive Apply thin-set adhesive to the backer board or drywall using a notched trowel. Spread the adhesive evenly, ensuring full coverage. Avoid applying too much adhesive, as it can lead to uneven tiling. ### Install the Tiles Carefully place the tiles onto the adhesive, gently pressing down to ensure good contact. Use a level to ensure the tiles are installed evenly. Tap the tiles lightly with a rubber mallet to remove any air pockets. ### Grout the Tiles Once the tiles are installed, allow the adhesive to cure for the recommended time. Mix the grout according to the manufacturer's instructions and apply it to the joints between the tiles. Use a grout float to press the grout into the joints and remove any excess. Allow the grout to dry completely. ### Seal the Tiles To protect the tiles from water damage, apply a sealant to the grout lines. Use a silicone-based sealant that is mildew-resistant and matches the color of the grout. Apply the sealant using a caulk gun and allow it to dry completely.
How To Tile Around Sinks Able Skills News

How Much Of Your Bathroom Should You Tile

Backsplash Advice For Your Bathroom Would You Tile The Side Walls Too Designed

Backsplash Advice For Your Bathroom Would You Tile The Side Walls Too Designed

Do You Need A Backsplash For Your Bathroom Vanity Diamond Kitchen Bath

Bathroom Design Getting Tile Around The Vanity Right

Bathroom Tile Ideas For Small Bathrooms

62 Bathroom Backsplash Ideas For A Stylish Makeover Remodel Tile Vanity

Tiling Round A Bath Bathroom Guru

Backsplash Advice For Your Bathroom Would You Tile The Side Walls Too Designed